Showing posts with label accessories. Show all posts

Monday, December 6, 2010

Deck the Halls- Dining Room

Ohh how I love decorating for Christmas. Here's what I did this Christmas in our dining room. Ohh how I love it.
It is just so easy with Red and Greenery and Sparkle all over!
 MMM take in the Bling Bling.

 I got my red ornaments last year at Target's after clearance sale for 90% off!!
That's like basically free. I stocked up but now I wish I would have gotten more. :)


 My Joy and Believe were after Christmas buys at TJ Maxx. 
This Believe banner could so easily be recreated by all you crafters out there.
Now who wants to join me for Christmas dinner?
Stay tuned for my Family Room, Kitchen, and Porch Christmas decor.
Coming Soon!

Thursday, December 2, 2010

2x4 Snowman Family

 How cute is this wood block snowmen family? I made them yesterday on a whim, and the best part is that  I already had everything on hand. I got my idea from Crafty chic mommy, then gave it my own special touch.

How great would these be for gifts?
 Supplies needed:
  • 2x4s or 2x6s
  • paint stick or thin wood
  • sandpaper
  • white and orange paint, brown ink or paint
  • buttons
  • glue- I used my handy dandy hot glue gun
  • ribbon for scarf
  •  wood or something for hat
 To make these is pretty self explanatory. Cut wood, sand, paint white. I then inked the edges brown for a  more rustic look. Glue body together.

Then glue on your cutie accessories. The nose is a cut up paint stick.
 For the hats I used baseball bat end discards that I got from the Louisville Slugger Museum for FREE. But not everyone lives in good ol' Louisville. So you could use the end part of your paint-stick (where it is curved), smaller pieces of wood, or fabric to make your hat or go with out. 
Get creative and have fun!
linking up to Funky Junk's SNS


cg holiday button

Tuesday, September 28, 2010

From Brass to Class

I picked up this goodie at a garage sale for one whole dollar! I knew that with a little tlc she could be beautiful.
I got out my trusty Oil Rubbed Bronze spray paint and went to town.

Ahh much better. Now she just needs a pretty shade.
I found this shade over the summer at a flea market for $7. Looks perfectly new too. :)
And here she is in her new found glory.
She looks much more expensive than $8 right. :)
She adds so much to this little table and seating area.
There is now height and a beautiful and functional focal point.
From Brass to Class sums it up perfectly don't you think?

Friday, September 24, 2010

Fabric Pumpkins- Ohh the Options!

I don't know about you but I love decorating for fall because you can leave the decorations up for so long.
SO today I will show you how to make these cutie fabric pumpkins!

With all your fabric options your possibilities are endless!

A great thing is they are easy and cheap. No sewing machine required!

You can even make pink pumpkins for your little girls room. :)
So turn on your Scentsy with some pumpkin pie scent invite a friend over for 2x the fun and get craftin!!
Supplies:
  • about 1/2 a yard of fabric will make about 3 pumpkins. One Papa one Mama and one baby sized.
  • leaves to match your fabric
  • DMC Embroidery Floss/ needle
  • a BUNCH of plastic grocery bags. (for the stuffing)
  • Jute twine/ pencil
  • glue gun/ glue sticks
  • Sticks cut to about 4 inches
  • rubber bands/twisty ties (an easy option)

Steps
  1. Wrap jute around pencil, bake at 300 for 5 minutes. let cool for 5 minutes. you know it's done when it gets stinky. ;)
2. Cut your fabric into 3 different sizes. one large about 16x30, medium about 10x22, small about 8x20. These are just guesstimates. Every pumpkin of mine is different which makes them all unique.
3. Fold the fabric in half with fold on short side. So if you are doing a large folded it would measure 16x15. Glue along edge with fabric right side facing in, like in picture.

4. Gather bottom of fabric. Tie with rubber band, twist tie or sew shut. I ran out of twisties and rubber bands. :< 5. Turn right side out and stuff with plastic bags until really full. (so that later when you do the lines with the embroidery floss it will poof.)
6. Put a stick in the top and stitch around top of fabric and gather.
7. With a long piece of floss tie a double knot in one end and stitch the lines from top to bottom going opposite of each other. Do 6 lines.
8. Glue on your leaves and jute, and secure stick with glue as well. And Wah lah you have a gorgeous little pumpkin!
This is a fun project to do with friends and make a little collection of pumpkins. I have been making these guys with friends for 5 years now. Fun every time.

Happy Fall Yall!

Saturday, September 18, 2010

A Custom Touch

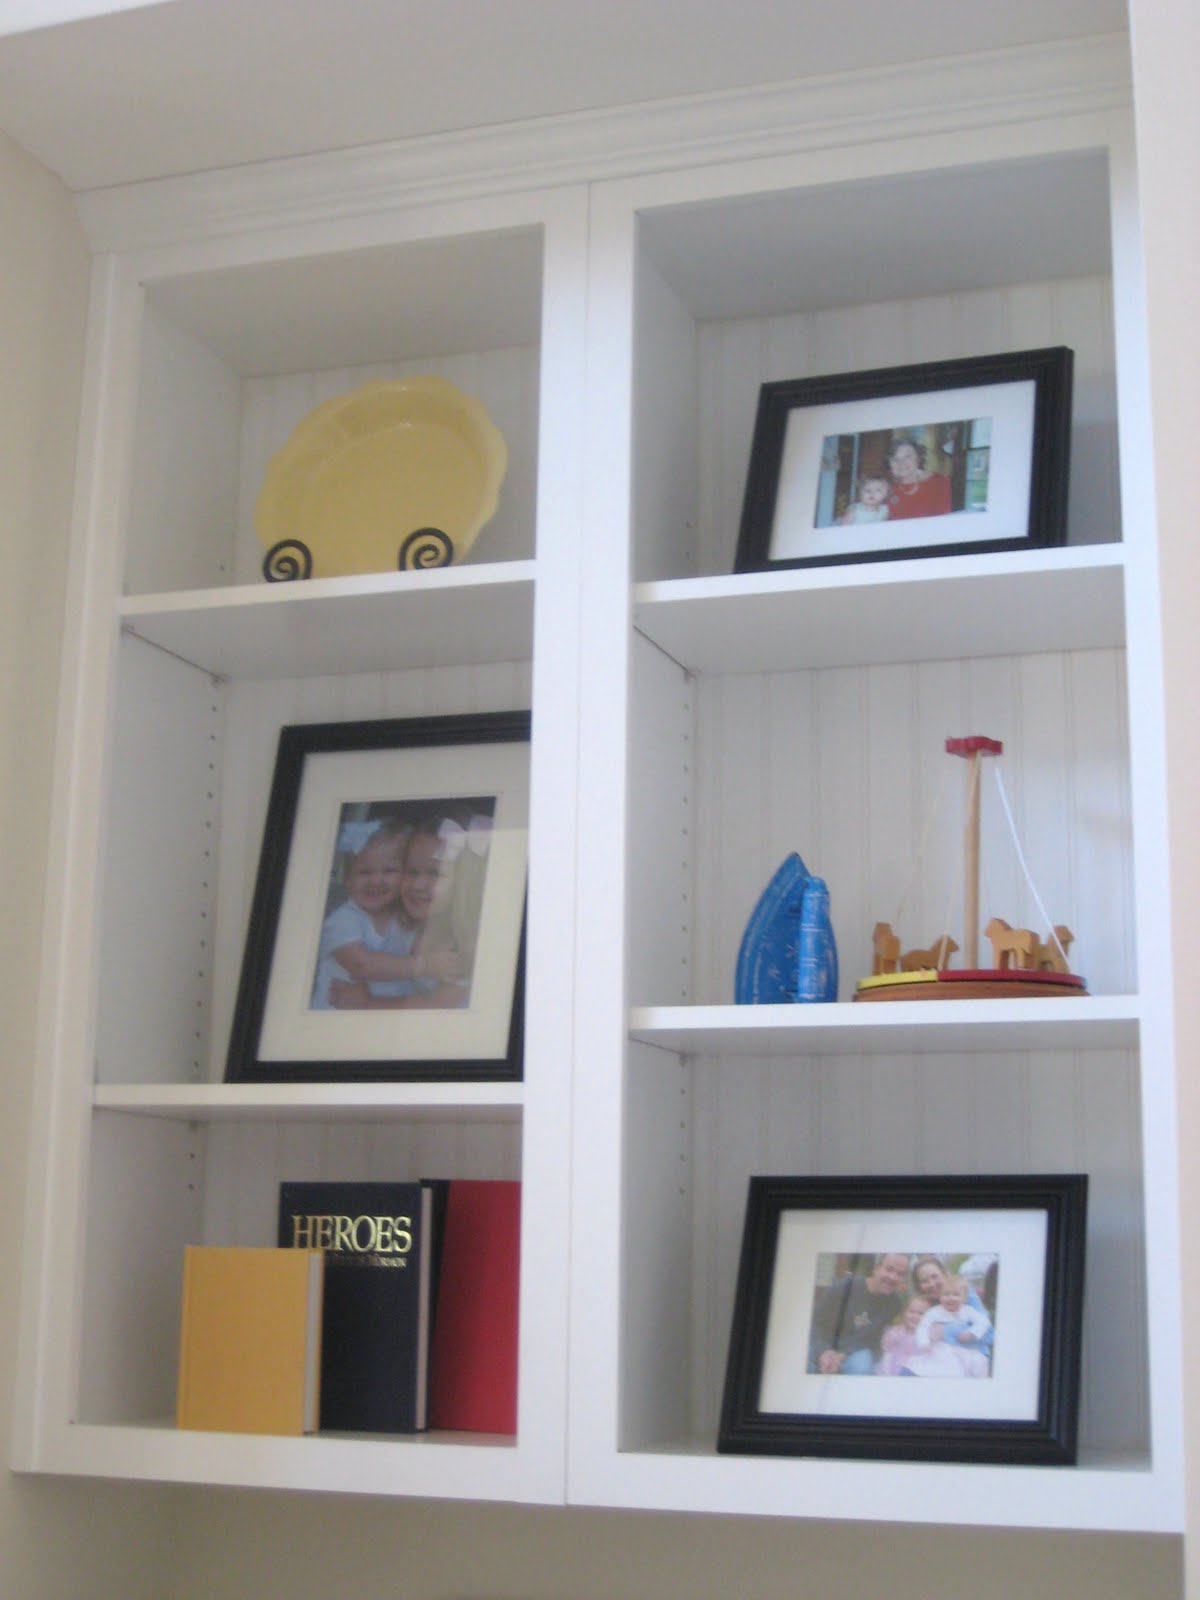
When we moved in we had the builders add bookshelves flanking our fireplace. Well... they were definitely builder basic. I thought they could use a little something something. And after we added beadboard to our kitchen wall. I decided our bookshelves would look nice with beadbaord to tie the rooms together nicely, plus I has extra beadboard. Saa-weet.

Before- builder's basic:

After:
A little something goes a long way. It ties my kitchen into our family room perfectly. With an open floor plan this was key.

Now for decorating these bookshelves. Oh how I struggled with this. I think I have changed them around every week for the past year we have lived here. :) We are always in this room and I "study" it far too much!

Anyways I remembered a "Design Article of Faith" that I learned in college and it applied here.
It is called repetition with variation.
  • It is when you use something and repeat it though out the design while varying it slightly.
  • It creates interest and unifies the design.
  • For instance I used black frames in different shapes and formats and repeated them throughout.
(Sorry the TVs on. I didn't have it in me to turn off the home movies my girls were watching
  • I also repeated yet varied books, ceramics and antiques using black white red yellow and blue.
I am much more pleased with how it looks with using this design principle or "Design article of Faith" as my professor called it. The past year I had cute stuff in it but it didn't feel unified at all. Now I can have a peace of mind when I look at it. :)
And of course this was all done on the cheap!! This is Savvy Chic Home you know.
  • The frames were $3 at Wal-mart.
  • Antiques were mostly presents or Goodwill.
  • The books I already had.
  • And if you are a regular reader you know that I got the mirror on CL for $10.
Everything on these bookshelves I got for about $60 or already had. Even better, beat that Pottery Barn.
The official first day of fall is Wed Sept 22nd (it started on the 11th here ;). So the next post is all about fall decor and how to make these fabulous pumpkins, cause you know fall just can't wait.
P.S. Don't you love my little brownie box camera ?

Monday, July 26, 2010

Beadboard Picture Wall


Wah lah here is my beadboard picture wall in my kitchen. I just love the way this turned out!!! So much brightness and a personal touch that can't be beat. I absolutely love looking at my cuties everyday.
And I just love my kiddie table and chairs.

Here is the before. Ugh so plain. Sorry to pain your eyes.


Now just for eye candy after that horrible before picture, here is a beautiful sunflower that we grew. Yumm just love it, and I can see it out of my kitchen window. Makes doing dishes a little better. :)
Related Posts Plugin for WordPress, Blogger...